Purpose of the article: In this blog, we have explained how we load the data from Azure blob to Snowflake.
Intended Audience: This article will help our Organizational level kind of developers working on Snowflake and Azure.
Tools and Technology: Snowflake and Azure.
Keywords: Load data from Azure blob to Snowflake using ADF.
Load The Data from Azure blob storage to Snowflake using Azure Data Factory
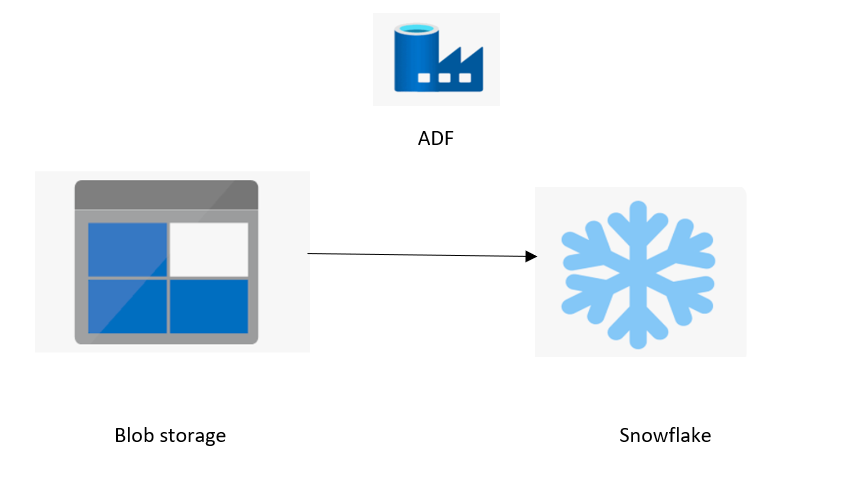
Data Flow:
Step1: Create a storage Account:

- Click on Create
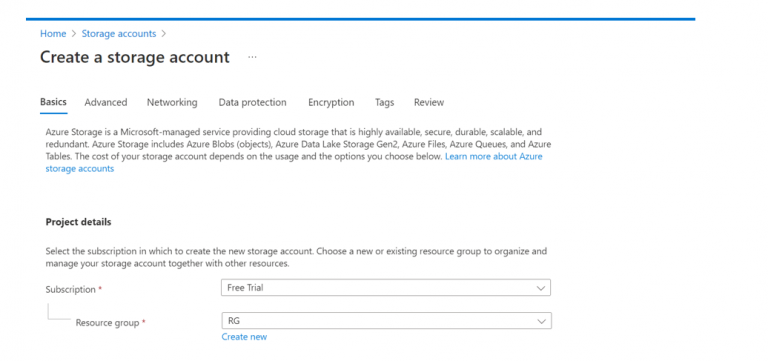
- Select the subscription and Resource Group for the storage Account
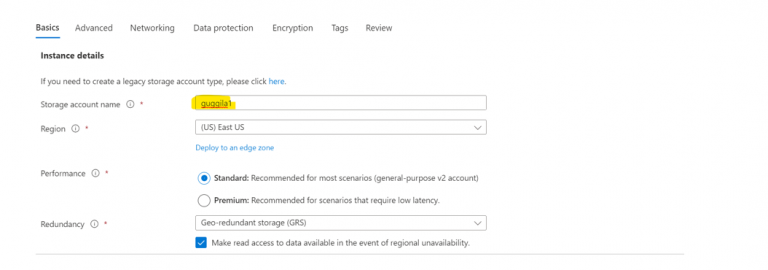
- Give the Storage account name
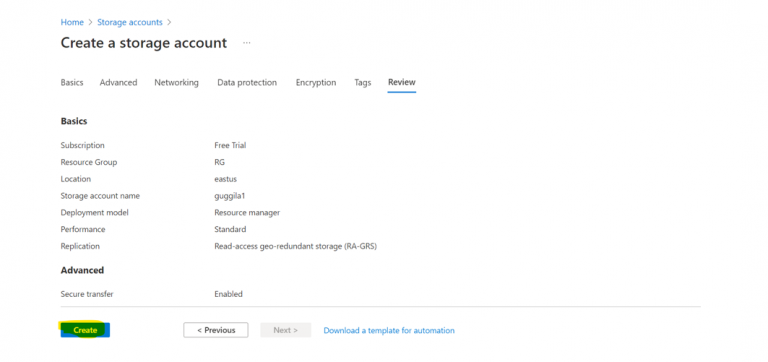
- Click on Create

Step2: Create Container:
- Create A Container within your storage Account as shown in below
Navigate to Storage Account>Data Storage>Containers
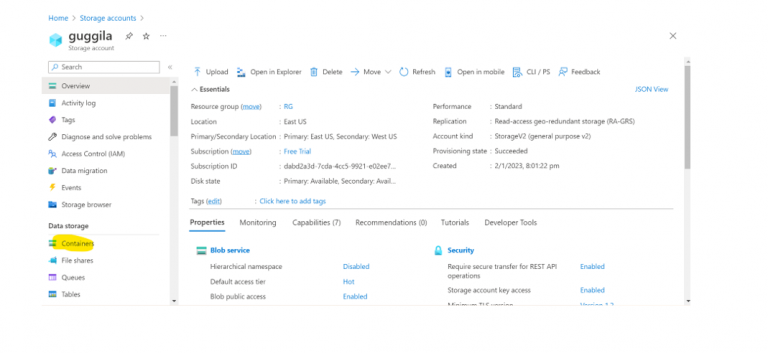
- Click on the Container and provide the required information

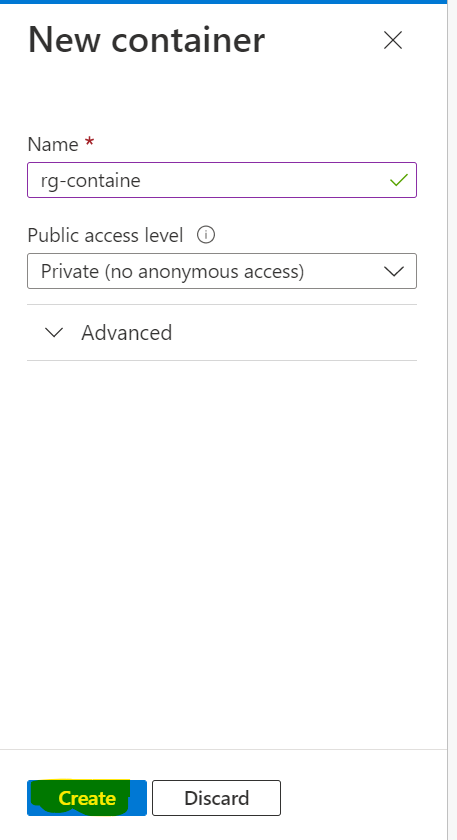
- Then click on create

- Upload a file to the container which you have loaded into Snowflake
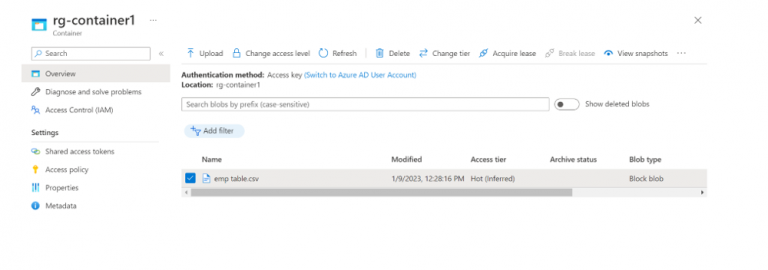
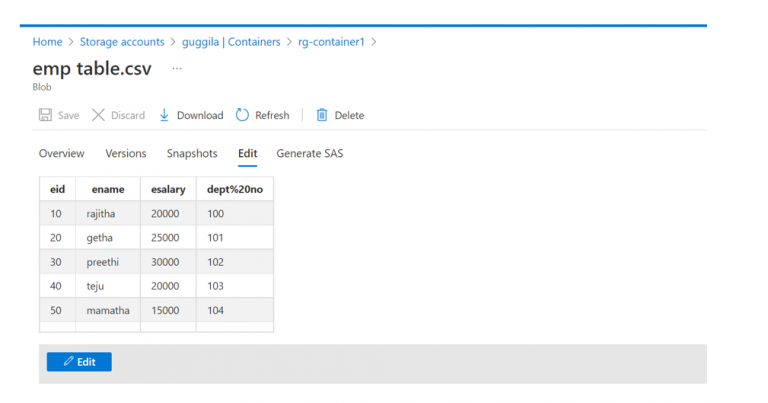
- This is the data I have to load Snowflake
Step3: Create data factory:
- Create Data Factory to load Data from Azure Blob Storage to a Snowflake

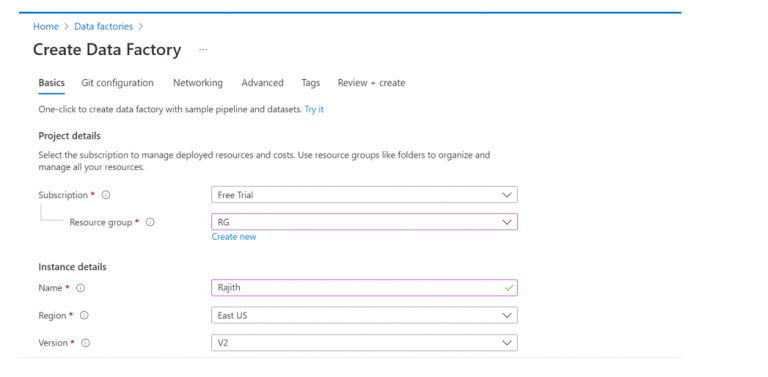
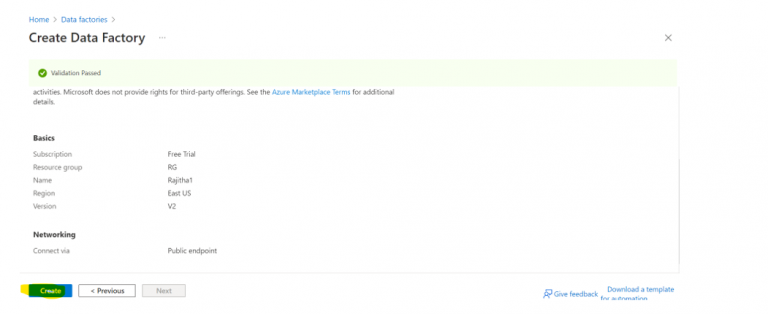
- Click on create

- The data factory is created
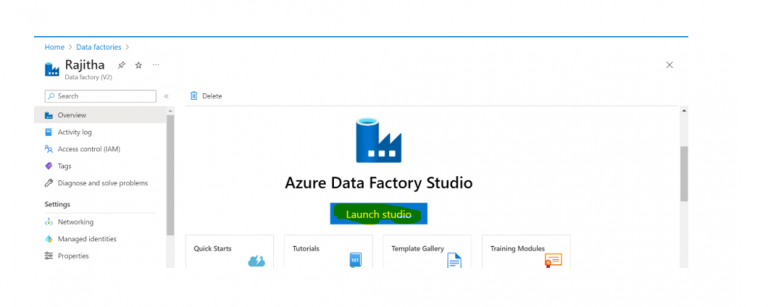
- Click on Launch studio; you can navigate to the below page
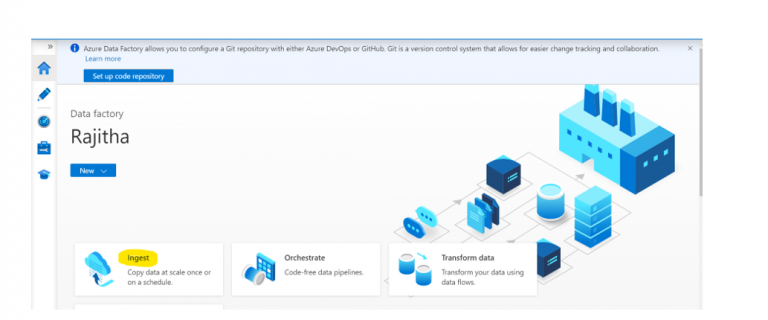
- Click on Ingest to copy Data from Azure Blob to Snowflake
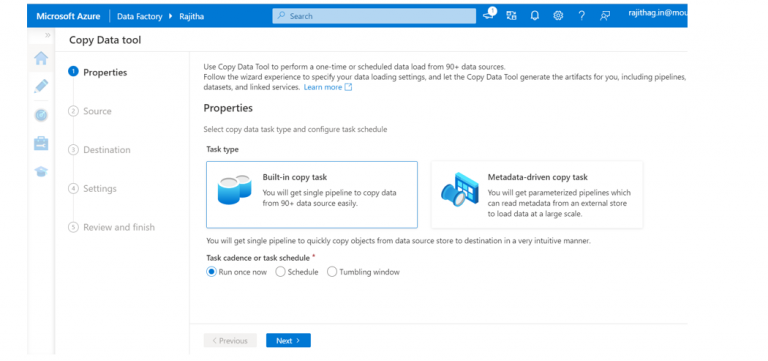
- Click On next, and here you select Run once now
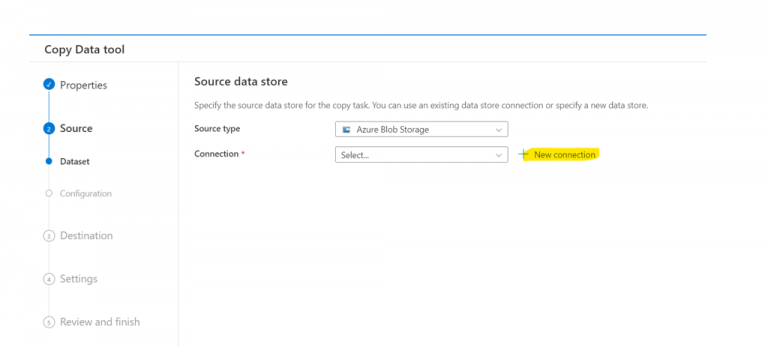
- Here you select the source as the Azure Blob Storage and then create a connection for the Blob Storage
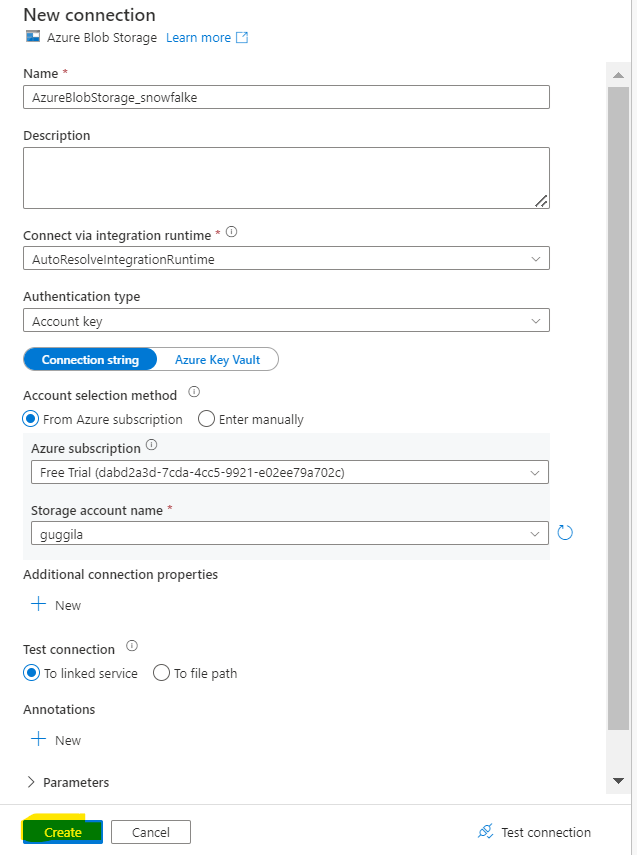
- Click on create
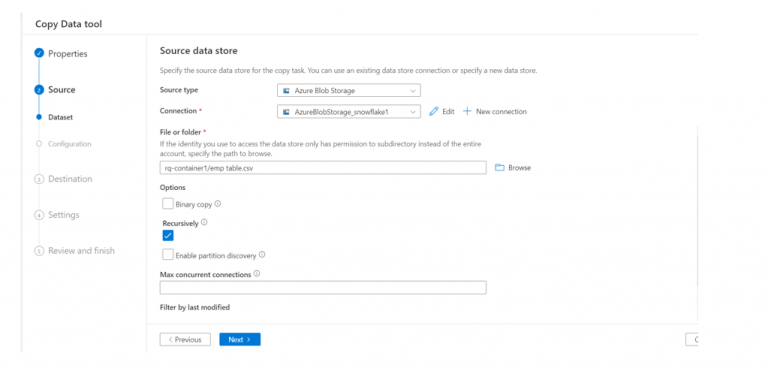
- Browse the file which files you have loaded into Snowflake and select recursively for that
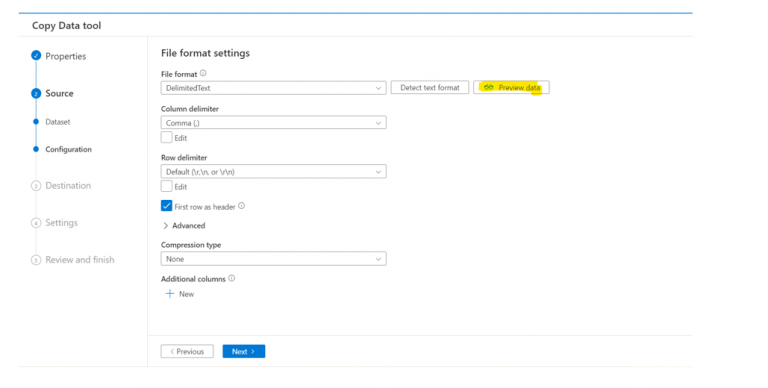
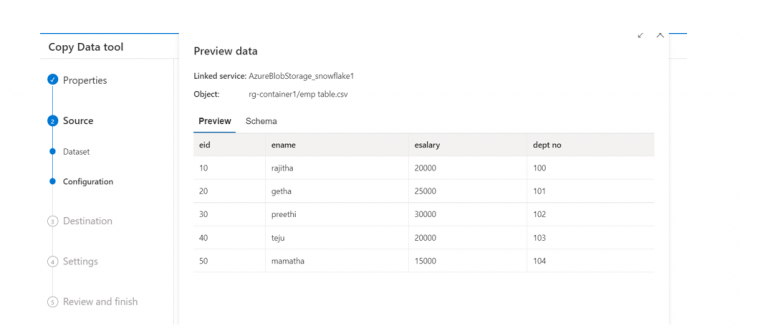
- This is the data I have to load into Snowflake
- Click on next

- Here you can select Snowflake as the destination and then click on new connection
- To create a connection for Snowflake, we need to create a Snowflake account
- In that we need to create a database, warehouse, and target table for loading the data from Blob Storage
- After creating the account, you have to sign in
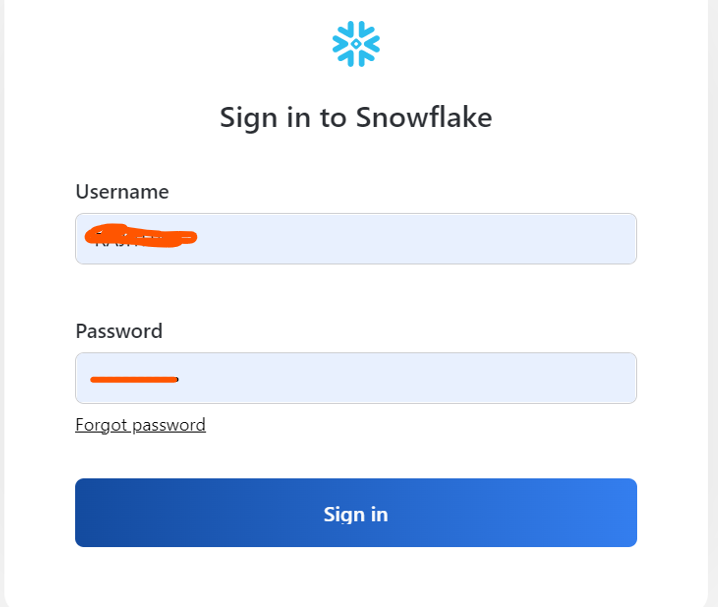
- Then go to the new workbook and create the database

- Then create the warehouse

- Create the Target Table to load data from the Storage account
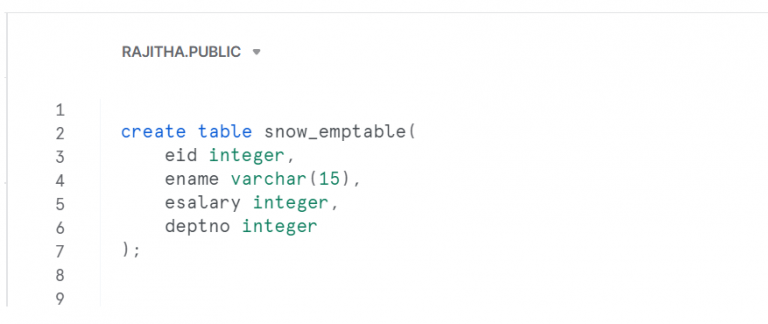
- Here we have to load the data into the above table
- Then go to Azure Data Factory. Here we have to give the above details for the destination connection

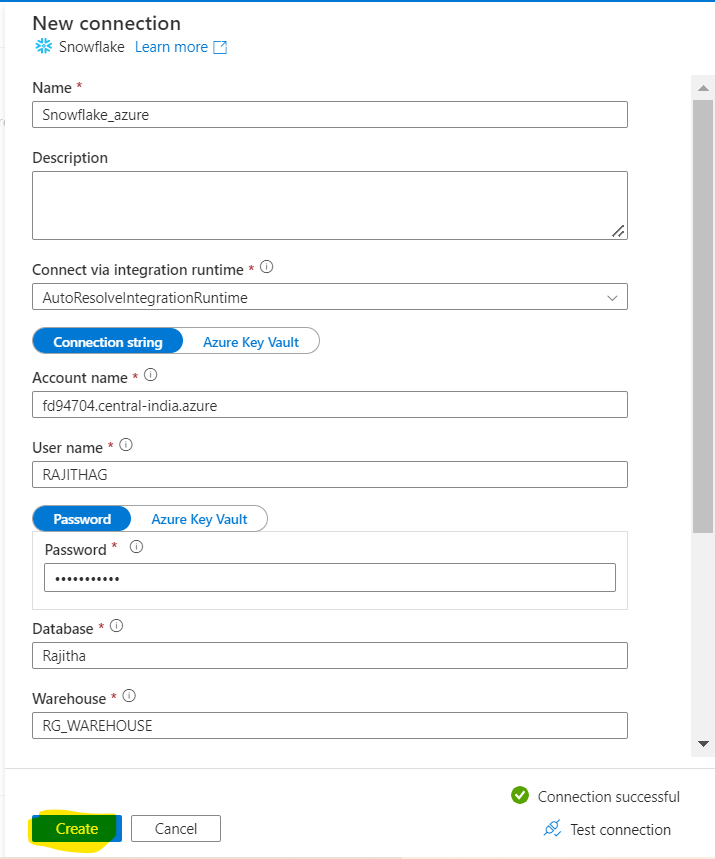
- While creating the connection for Azure, we have to give the required details
- Click on create
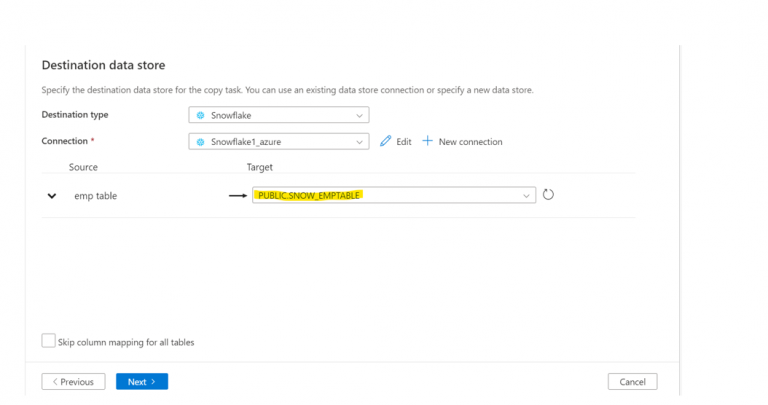
- Here you can select the target table, which you have to load the Data from the Storage Blob
- Then click Next
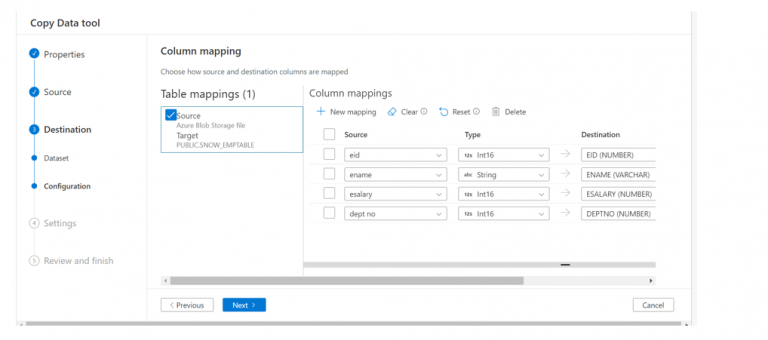
- Then we can do the table mapping
- Click Next
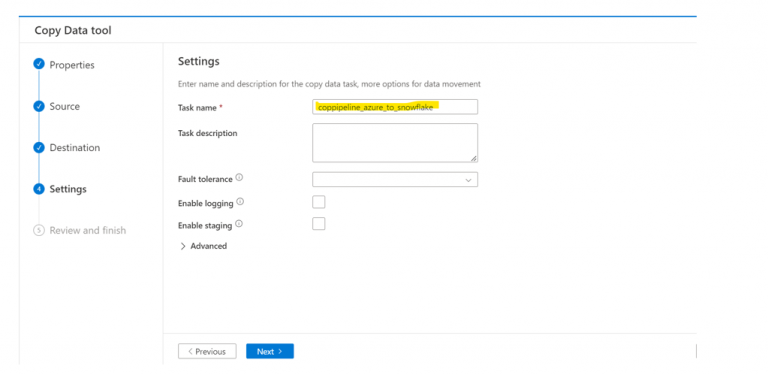
- While clicking on Next, we get the below error message

- To avoid this error, we have to change the Authentication method to SAS URI Authentication
- Then you can again go to the source. Click on edit connection then you have to select the authentication method to SAS URI

- Click on the Edit option
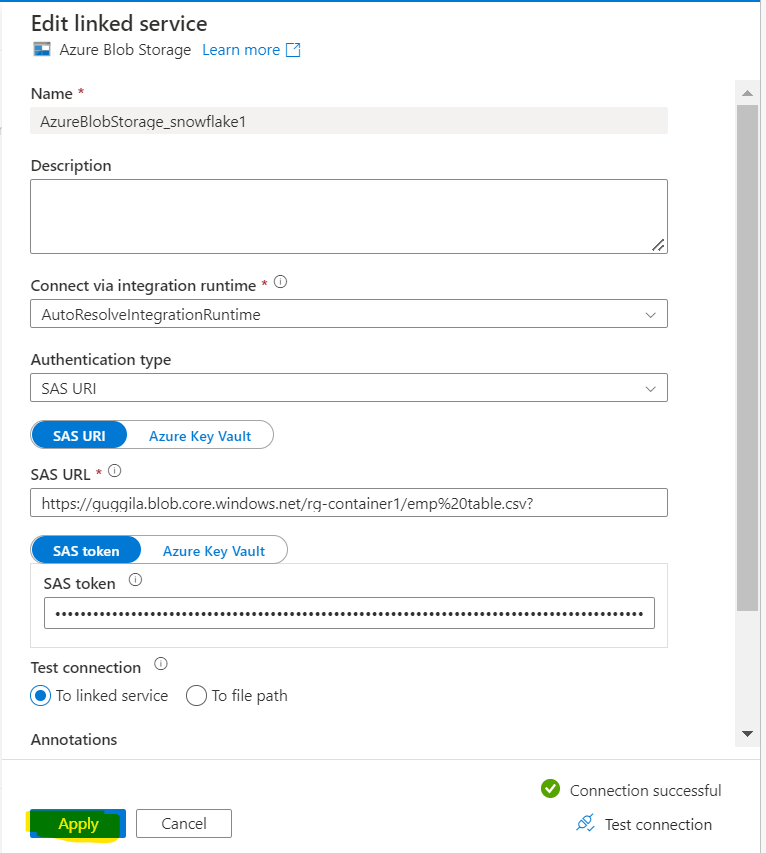
- For the SAS URL and SAS token, you can navigate to
Storage accounts>Security+Networking>Shared Access Signature
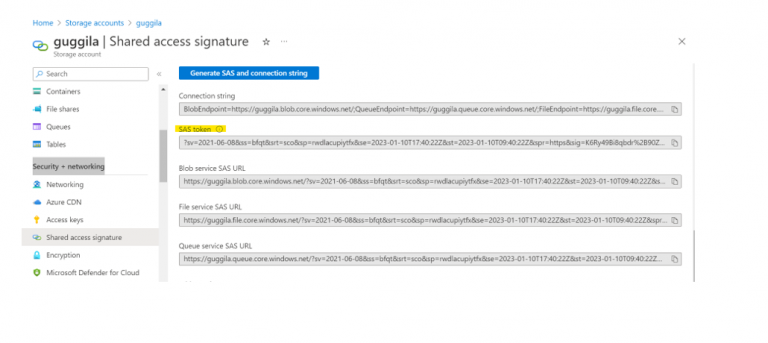

- Here you can give The SAS URL as only a yellow highlighted one
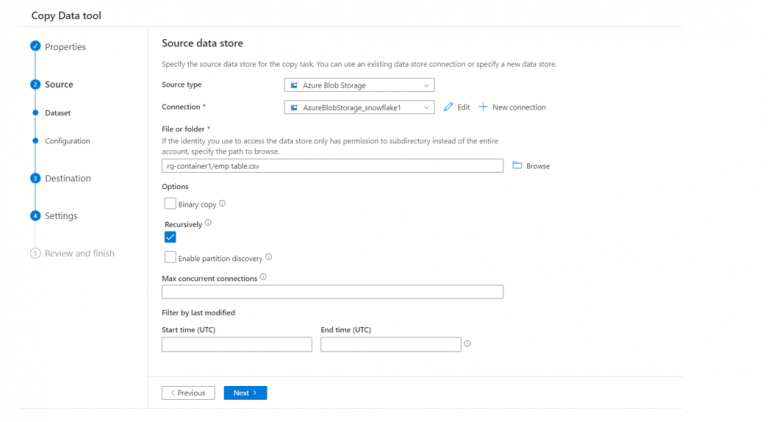
- After the edit, you can click on next
- Then go to Settings you can enable the Staging
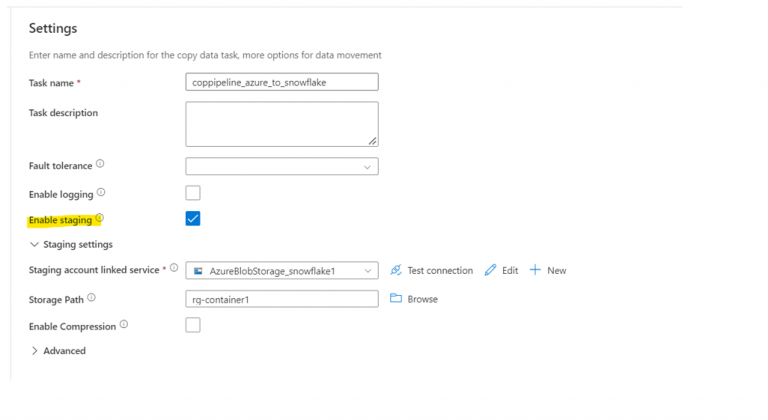
- Click next
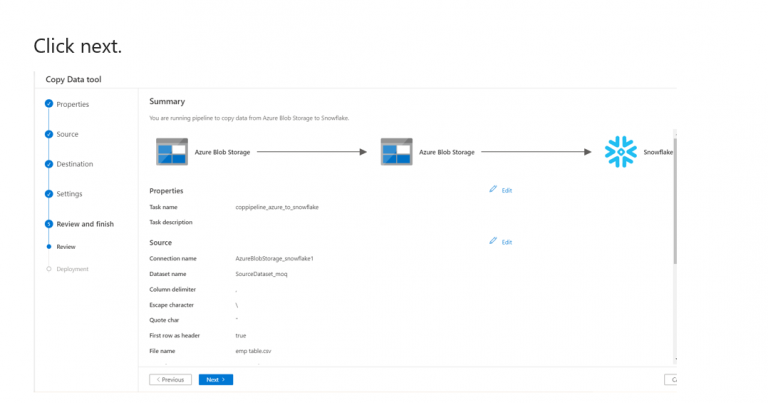
- Click on next
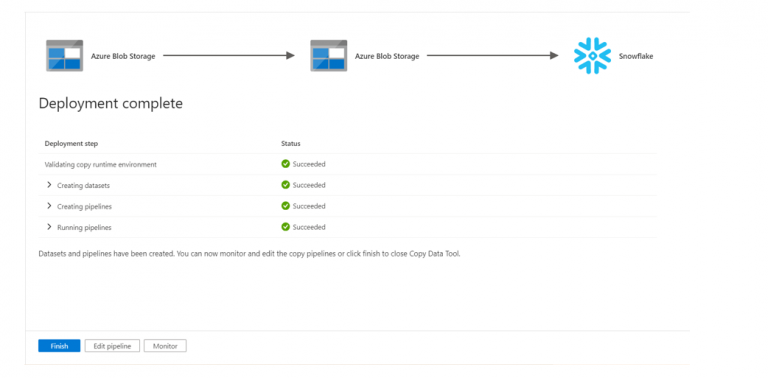
- After clicking on the finish and then going to the pipeline, it will automatically create a pipeline with copy data activity
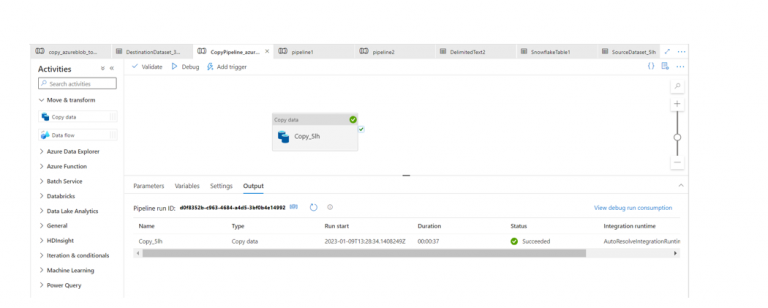
- The pipeline has successfully run
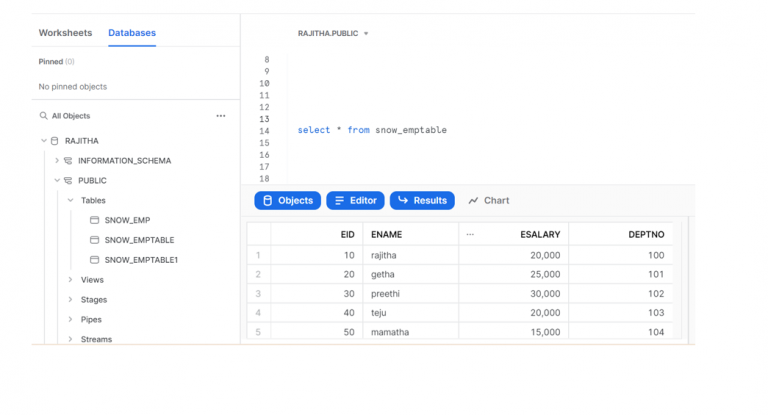
- Then you can log in to snowflake
- Check the target table for loaded data
Author Bio:

Rajitha GUGGILA
Associate Software Engineer
I am Rajitha GUGILLA. I am an Associate …. MOURI Tech. I have been working here for the past 1.5 years. My areas of expertise include SQL, AZURE, AWS. Hope you like this piece. Please share your feedback.


